Project FAIL

We make plenty of mistakes here on our hobby farm, and I think it's important to share them. Sometimes plants don't grow,  the deer get the choicest fruit, or bee colonies die. Things go wrong. In the now-immortal words of Taylor Swift (yes, I have a 'tween girl), I try to shake it off and move on, and learn from the experience (sometimes that's hard). One of the first things you realize when you start a garden - you can do everything right and still fail. And it's ok! The important thing is to keep trying, and rejoice over the successes (which by the way, far outnumber the failures, thank goodness). And sometimes, you set yourself up for failure without even realizing it.

For instance, this past weekend, I told Tom I needed a simple box made out of scrap wood. He started the project at the end of the day Sunday when he was bone-tired from working on the drip system. He tried to  knock something together. A little piece was wonky, so he tried to correct it; then another piece looked weird, and he tried to correct that, and before he knew it, the whole thing snowballed and he ended up winging it across the yard in anger. Lesson learned? Plan your project, don't just try to throw something together.

Now that I've had time to think about it, and watch the chickens more closely, I realize that they are doing just fine for their dust baths (a necessary activity for chickens, as it helps keep them clean and mite-free) by scratching down in the run and finding a nice patch of sawdust. No special box needed. I wish I had thought more about it before I requested Tom make one, as I could have saved him a great deal of frustration.

You can't see it, but there are deep holes in the litter where the chickens bathe

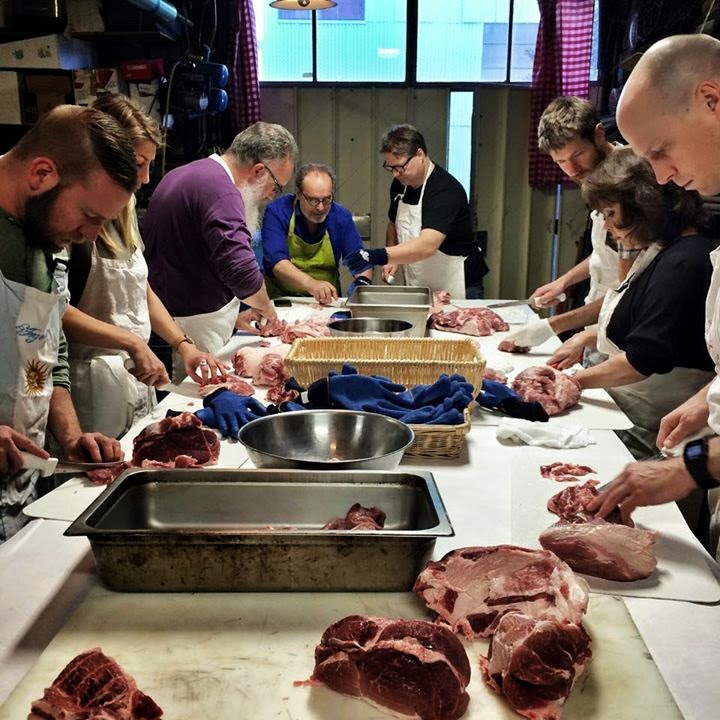
My own fail came when I made suet cakes for the wild birds. I've noticed the birds don't like the store-bought cakes; they really prefer the homemade ones, no surprise there! I made suet cakes this past Christmas with beef fat, and the birds went wild; I swore to always keep a supply on hand. This weekend I used the pork fat that Tom brought home from his sausage-making class. I rendered it in a huge pot, added peanut butter and birdseed just like last time, poured it into a dish and let it harden in the fridge. I added a slice to the suet feeder and waited for the birds to go crazy for it. Nothing. Not one bird visited. Then this happened:

Yuck

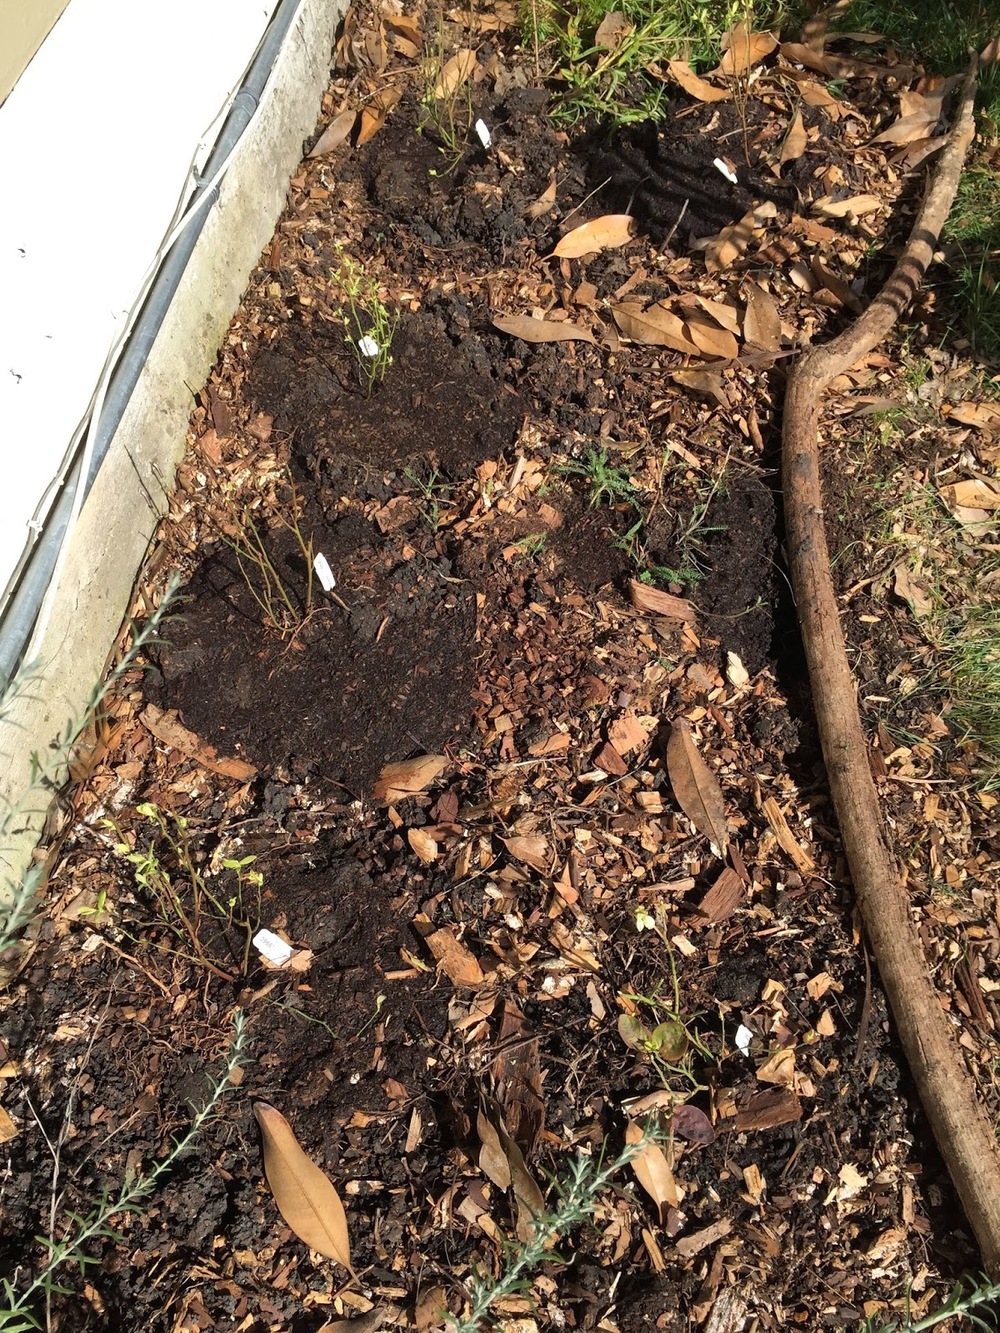
In our recent warm weather, the suet melted and dripped out of the feeder, and the whole thing fell apart. Every day our delighted dog goes out and licks up whatever he finds on the ground. I didn't realize that my homemade lard, without stabilizers, would drip away in the heat. I've wrapped up the remaining cakes and put them in the freezer, to wait for winter. Frankly, the birds have enough to eat right now without my help, as they showed me when they didn't even visit the feeder. Lesson learned? It's time to clean and store the bird feeders for the summer, as they can take care of themselves right now!

I tell this to my kids all the time, but it bears reminding ourselves as well: It's good to make mistakes. We learn better when we mess up. Success is wonderful, but it doesn't always provide the best lesson. Let's give ourselves permission to try, and keep trying!

Oh, and sorry for the Taylor Swift earworm. You'll be singing that all day. Another mistake. :)

Living Wall, part 2

Back when we made our Vertical Strawberry Wall, Tom also prepared a second pallet for me. It's been sitting out on the front porch for weeks now. I'm sure my neighbors were wondering....  This weekend I finally made another living wall out of the pallet.

Our front porch is tricky; it's in shade most of the day, but around 3:30 the sun starts creeping up and by 4 the porch is in full direct sun. It gets about two hours before the sun starts dropping behind trees. So, not a lot of sun, but very hot when the sun is there. Plus the porch traps heat and in the summer can be quite warm. I've only ever been able to grow coleus in this location. so my original idea was a wall of coleus - which would be pretty, right? All those different leaves. But when I visited The Moraga Garden Center, I changed my mind. I hadn't been there in years and had forgotten how many interesting plants they carry there (thank you Jo for the suggestion!). The staff is knowledgeable and I had lots of help.

I got sidetracked picking out Lewisia for a different part of the garden - I've always wanted this plant and it's always sold out everywhere that carries it, which believe me isn't very many places. I scored three - one white, one peach, one pinky yellow.


But eventually I got busy picking out stuff for the living wall. I chose several colors of sedum and some campanula for the base plants, then added some different kinds of low-growing geraniums and fuchsias for accent. Kate helped me plant everything, and I think it turned out beautifully.


The thing I've experienced from the strawberry wall is that for a few days, dirt comes out. Gravity happens! It's a bit messy for a while, and then the roots start holding on to the dirt and everything starts to look cleaner. You could plant practically anything in a pallet - lettuce? If you've got a small balcony or porch, this is the way to go, I think. Regular containers are expensive!

In the vegetable beds, I pulled out the Asian Braising Greens as they were bolting. I fed what I could to the chickens and composted the rest. Then I seeded some carrots in that bed. The whole bed will eventually be carrots, but I plan to succession plant them so we get a harvest over several months.

Tom finished the drip system; it ended up costing about twice what we thought it would, and I'll let Tom tell you in a separate post all about the process. We both certainly have learned a lot. I'm looking forward to hand-watering only my containers.

I cleaned the chicken coop as I do every weekend. It takes about an hour. I don't clean the whole run: I am using the Deep Litter Method there and will only clean that out once or twice a year. But I do clean the hen house once a week. I pull out the soiled straw and add it to my compost bin, and then replace with fresh straw. I change the water and add food to the feeder. I rake the run and add another layer of pine shavings. There is absolutely no smell at all in the coop except for pine. The chickens are getting big, and every so often, amid the 'peeps,' we hear a 'BWAK!' They're growing up.

I spent a good amount of time today painting some new garden markers. I enjoy this task, and it was a pleasure to sit on the back porch in the sun and make another ten markers or so. Here's a few:


I can't tell you how many times I hear, whilst folding laundry in the bedroom, folks walking by the garden and saying, "What's that? Oh, I see, it's broccoli!" or whatever. Especially parents with kids seem to enjoy pointing out the signs and holding the kids up to look. I told Tom today, I used to hope people would stop and look at my flower garden and noticeably enjoy it. But that happened rarely. Since we put in a vegetable garden, not a day goes by that someone new doesn't stop and take a long look. It is my goal to make our vegetable gardens look as beautiful as our flower gardens, and show others that a yard planned this way can look wonderful. Hopefully it will inspire other folks to do the same.

Speaking of the flower garden, I planted about 50 sunflower seeds today, of five different varieties. Sometimes I have luck, sometimes not. The salvias are starting to bloom; I have them in every color, and I've never met a salvia I didn't like. Soon they will vying with the poppies for attention. Bumblebees and carpenter bees are all over the Western Redbud. I can't wait to pick up my new honeybee colony on April 11 (still hoping to find a swarm, though). Butterflies have started visiting.

And speaking of butterflies, here's a photo my co-worker took of a Pipevine Swallowtail, which are hatching in great quantities all over the property near our school. They are really gorgeous.


Isn't that a great shot?

Happy Spring! Hope you're able to garden, whatever your weather!


Salumi with Angelo Garro

Today, another guest post from Tom:

The best presents are the things that you wouldn't buy for yourself, but that you'd love. That's exactly what Elizabeth got me in the form of a salumi class with Angelo Garro, which I had this past weekend.

First, a word about Angelo -- if you've read The Omnivore's Dilemma, then you'll recognize him as the person who took Michael Pollan on his foraging and boar hunting expeditions in the last third of the book. A blacksmith by trade, and a Sicilian by birth, Angelo has started selling products based on his cooking (after having run a pretty successful Kickstarter campaign - nice to have Werner Herzog do your Kickstarter video).

Angelo recently started having classes -- our salumi class was the second one. We were instructed to show up at his place of work, the Renaissance Forge, at 10AM. No end time for the class was given, but it was billed as including a lunch, so I figured I'd be there for a few hours.

Door to the Renaissance Forge
A quick terminology note -- salumi is the generic term for Italian cold cuts; salami (or salame) is a kind of salumi, so is proscuitto, mortadella, coppa, pancetta, lardo, etc. Cured meats, usually pork, definitely yummy.
The class was a small affair -- I was one of just a handful of students. Two had flown up from Southern California for the class, there was a couple who run the Camp 4 Wine Bar in Modesto, and a young guy that chefs for a tech startup (cooking breakfast and lunch for 75 employees five days a week). Angelo had two assistants, Victoria and Beth. We started with some chit-chat, a walk around the forge, a peek into the walk-in cooler where he's got several types of salumi hanging, near where his four barrels of homemade wine are fermenting.

Forge tools
Soon, we started our salumi process -- many many pork shoulders needed to get trimmed, so we all stood around a long table, knifes in hand, trimming away fat, separating muscles, cutting into small chunks for grinding. We wound up with about 37 pounds of trimmed pork.

Many hands make light work
As we're cutting, we also start eating. Beth fried up some foraged greens that had been chopped, mixed with Parmesan, and fried into little bites. We had sliced lardo and other salumi on bread. We tasted some of Angelo's Omnivore Sauce. Beth made some fried battered broccoli and anchovy. Angelo brought out two versions of a new hot sauce he was trying, asking us which we liked better.

Just a few little bites
While the pork rested in the refrigerator (the better for grinding), we cut some back fat to add to the mix, and also uncorked a few bottles of Angelo's 2013 Syrah. Our work done, we then set to grinding.

This industrial grinder made quick work of our pork.
The ground pork was mixed by hand (for a loooong time) with the spice mixture, then he brought out his sausage-stuffing contraption -- a long cylinder with a hand-cranked plunger. We'd previously rinsed out some natural casings, and we each got a turn at both the crank and the extruder end, filling casings, tying them off, pricking the casings to eliminate air pockets, and giving them a bath in a starter culture.


The salumi would sit in a warm, humid spot for about two days to give the starter culture (i.e., mold) a head start, then it's off to the cooler to age for 2-3 months.


Our work complete, it was time for lunch - a fresh pasta with several kinds of seafood, some salad, more syrah, then for dessert some homemade biscotti, figs, some homemade nocino (walnut liqueur), and espresso.  We talked about food, we talked about places to go in Italy, we talked about gardening. At one point Angelo left to take a phone call -- it was Paul Bertolli, of Chez Panisse and Oliveto fame. (Can you tell I was completely star-struck?)

We finally said our goodbyes, goody bags of previously-cured meats, leftover pork bits, and Omnivore Salt in hand, around 6:30 PM.

Best. Class. Ever.

As Elizabeth and I have embarked on our homesteading efforts, we've become attuned to craftsmanship, and of the appeal of home crafted items. Yes, it's harder to make things from scratch, but how great to know what you're eating. How good it is to know the work involved in making things - it makes you appreciate them that much more.

Vertical Strawberry Wall

Ok, not an entire wall!

I watched an episode of Growing a Greener World which was all about living walls, and immediately I knew I wanted to try this with strawberries. When I ordered bare-root raspberries and blueberries, I also ordered 100 bare-root strawberry plants in anticipation of this project.

The fruit came yesterday. I left it in the boxes overnight, then around 7 this morning I unwrapped everything and put it into buckets of water to rehydrate.


The blueberries (Jubilee and Misty varieties) and raspberries (Latham) were planted in the conventional way, in open spots that get morning sun and afternoon shade, but we made a living wall with the strawberries.

First we needed a pallet. When we went to the hardware store to ask if they had any available, they said "how many can you take?" so pallets are easy to find. The first step is to wash it and make sure it's not made of yucky or treated wood.

You'll need landscape fabric, a plywood sheet, plastic sheeting, and lightweight potting soil. You'll also need some way to attach the pallet to the wall; we used L-brackets.

Here's the place we decided to put the living wall. This is Adam's Make-A-Wish train shed. I removed the train signs (he'll keep them inside the shed), and we marked out our spot.


Then we got the sawhorses in place and started working on the back of the pallet. First we attached the landscape fabric, then the plastic sheeting, with our staple gun. Then the plywood went on with screws. We also made a bottom panel out of some leftover tongue-and-groove from the chicken coop and drilled drainage holes in it. After the back was complete, we lifted it up and made sure we knew where we wanted it to go. Tom did some prep work with the brackets.


Then we turned the pallet over and dumped in two cubic feet of potting soil. We spread that out, then untangled the 100 bare-root strawberry plants (I got two June bearing varieties, Allstar and Honeoye, and two Everbearing varieties, Eversweet and Tristar) and spread them out on top of the dirt. Then we filled in with another bag of potting soil.


Next we had to mount this behemoth. This took three strong people. Tom putting in some brackets beforehand was genius, as we could rest it there. Plenty of dirt spilled out during this stage. After the pallet was secure, Tom finished bolting it to the studs of the shed.


I planted the top with several leftover plants, and packed dirt in. Watering it was a little scary, as lots of dirt fell out. I imagine as I water it (and it's going to need a lot of water, as it's in full sun against a white background), and over time, I'll have to add dirt.

Now that we've done this once, I'd like to do another living wall with coleus for our front porch, which gets only one hour of sun per day. I'd like to modify the pallet so that it stands up on feet. I can see lots of uses for this kind of planting.

Here are the raspberries and blueberries, planted with plenty of compost. It was a fruit day, for sure!


February arrives!

I'm so thrilled with the way the vegetable garden is thriving this winter. Part of it is due to the weather; we haven't had nearly as many heavy frosts as we did last year, and it's been sunny and warm for most of January. But part of it is the success of the hoop houses. They've kept the temperature steady in the beds, and also have kept the deer out! I know the deer have been sniffing around, because the peas regularly get a haircut, but nothing else has been eaten.


Speaking of peas, they've finally got some flowers on them. I guess I've decided that peas are not a true winter vegetable for us; they prefer things slightly warmer. They are loving these sunny days.

I opened up the hoop houses this weekend, to let the veg benefit from these gorgeous days. I will definitely be harvesting. I have more greens than we can eat. I'm putting them in everything; I even tried a recipe for meatloaf that included pureed kale. I loved it. Not so sure everyone else did. We are eating greens for breakfast, lunch, and dinner. Greens are the new zucchini. If you live near me and you'd like to take some off our hands, come on by and we'll harvest some for you.

The garlic and shallots are looking great.


The blueberries are blooming, and I just saw my first strawberry blossom, as well.


Many of the fruit trees in the neighborhood have started flowering. Yes, it's very early, and I'm glad my apple and peach don't show any signs of that, yet.

Seedlings of native plants are already coming up.


And the narcissus is finished blooming, while daffodils are beginning.


I've seen many interesting things on my hikes, lately.

Who says turkeys can't fly?

Shelf fungus

wild iris, planted by someone long ago
Wild mustard, soon to be ubiquitous, but pretty when new

fallen log with woodpecker holes

a beautiful vista in the Mt Diablo foothills

My dad finished our bed, and we love it. Not only is it gorgeous, our whole bedroom smells woody and wonderful. Here's a picture of one of the pencil posts:

I like the color of the wood, sugar pine

And, coop construction is coming along. Tom finished the roof and the framing for the hen house (inside the run), and together we got the hardware cloth installed and the trench backfilled. Dad came over and helped us with some supplemental bracing, and built the door.

building the door

hardware cloth, bracing, and door installed, trench filled
Next week, we'll start working on the hen house, which will be on the left upper quadrant.

I'm working on my online order for more blueberry bushes, plus some raspberry canes and elderberry bushes. I'm considering a small Meyer lemon. I also need to work on getting artichoke starts in the ground (Kate wants to be in charge of those), and I'm hoping to make a vertical planting wall out of a pallet, for more strawberries. We need to build the new raised beds, plus convert all the sprinklers to drip. Plus, get more ceonothus and manzanita bushes in, and I need to order my veg seeds! Lots of stuff to do, and spring isn't even here yet. I'd like to find some things to grow around the coop, too - some sort of deciduous vines or maybe olive trees. They'll need shade in the summer. Ideas, anyone?

I wanted to let you know about a new online magazine that I find amazing, and I can't wait to see what the next issue is like, as I've already devoured the first one. It's called Craftmanship, and the first issue is all about agriculture. I love their mission and view of the world. I'm excited to see more.